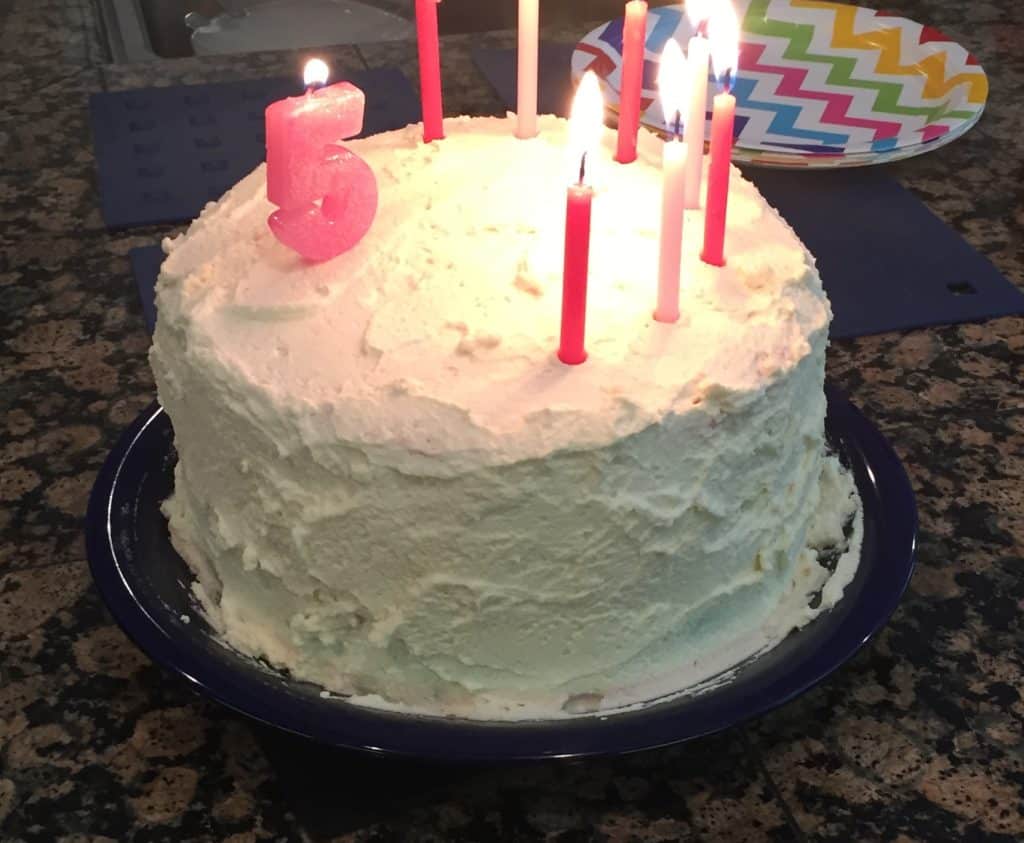
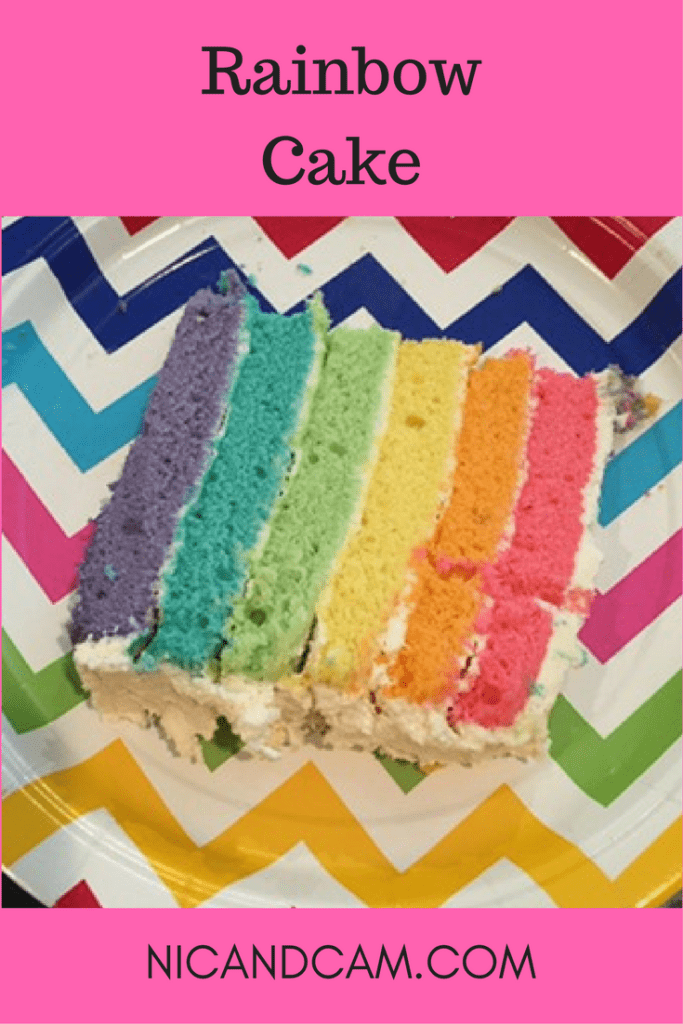
Older Daughter & Younger Daughter’s birthdays are close together, so for their combined family party this year, they both requested a rainbow birthday cake. Well, here we go…a 6-layer cake! I started out with my favorite Vanilla Butter Cake recipe (Note: This cake is very dense, and some may think it’s not moist enough. I love it!). I made a 1.5x recipe, which equates to these measurements:
- 4 1/8 cups cake flour
- 2 1/4 cups granulated sugar
- 5 5/8 tsp. baking powder (-or- 5 tsp. + 1/2 tsp. + 1/8 tsp.)
- 1 1/8 tsp. table salt
- 18 Tbsp. unsalted butter, cut into tablespoon-size pieces, at room temperature
- 1 1/8 cup milk, at room temperature
- 2 1/4 tsp. vanilla extract
- 6 eggs
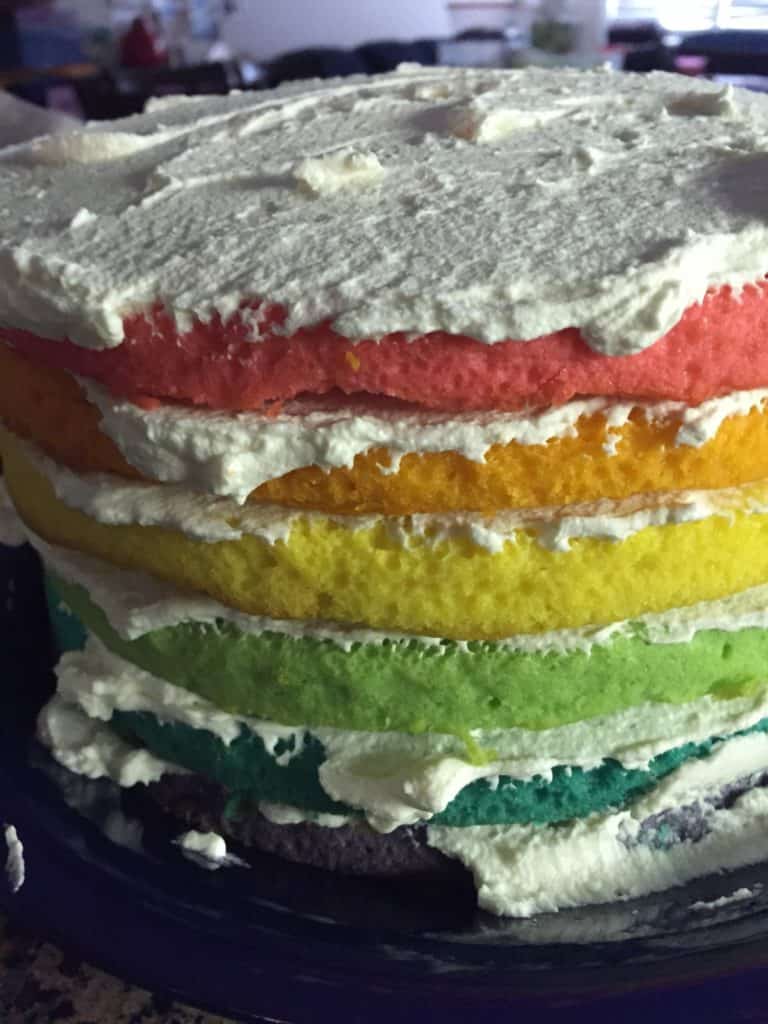
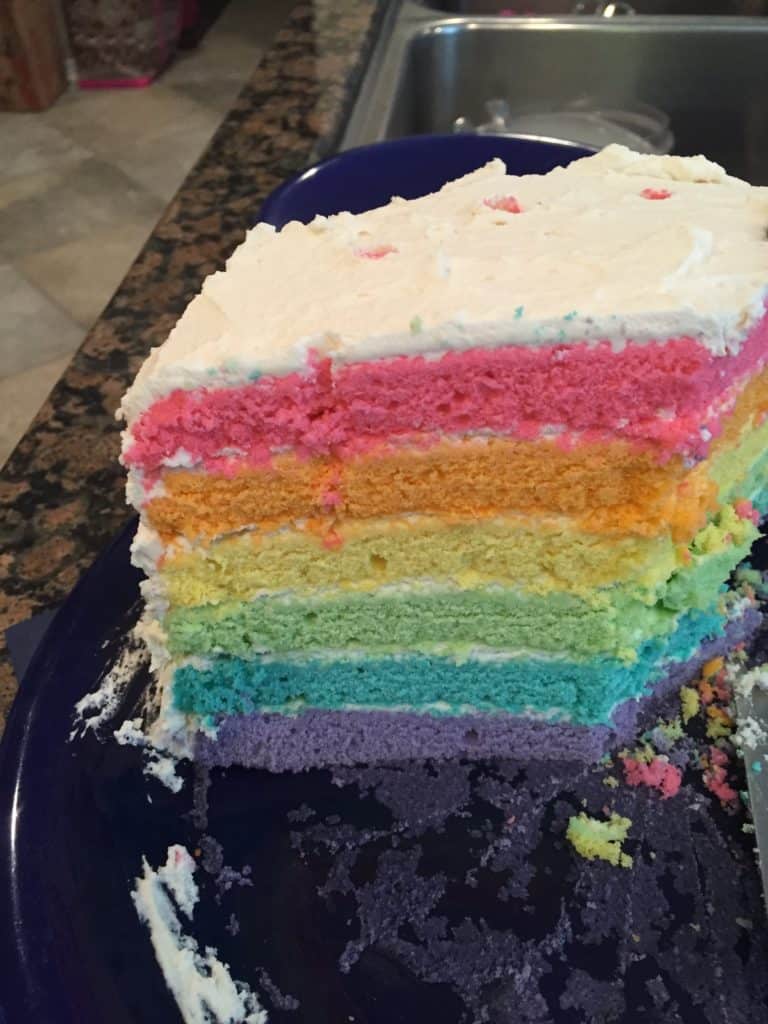
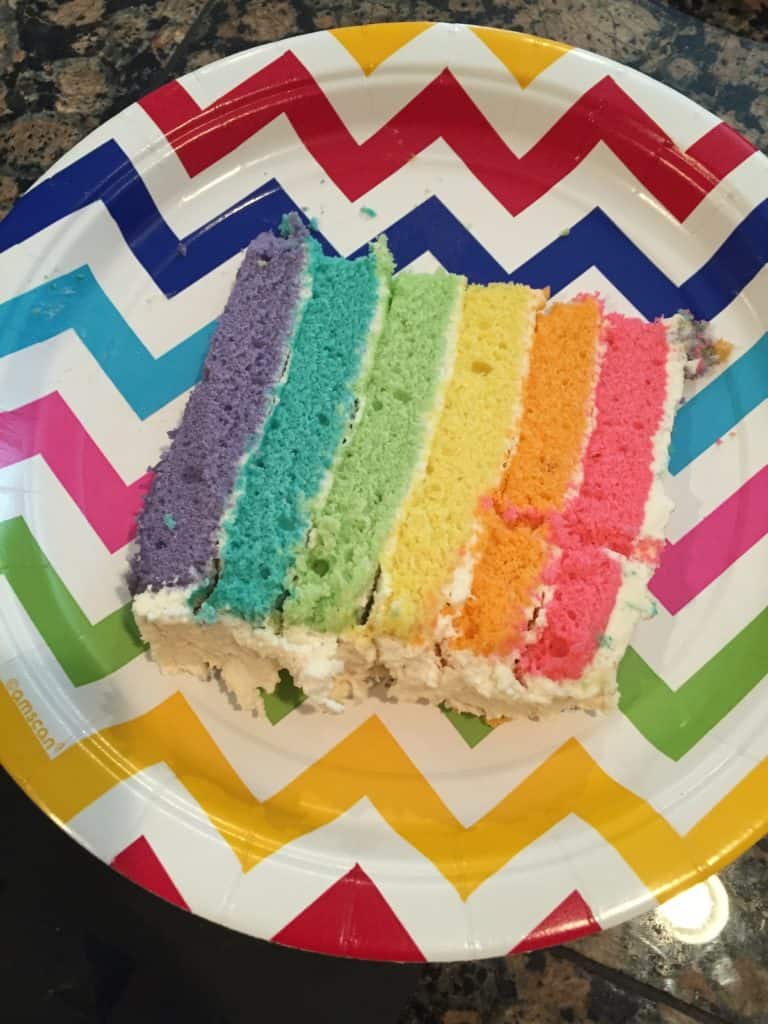
Follow the directions in the linked recipe, for preparing the batter. Then, separate the batter evenly into 6 bowls. This will be approximately 1 1/2 cups of batter in each bowl. The next step is to make the rainbow colors! Using food coloring, create the colors that you want for each layer. Our layers turned out to be: pink, orange, yellow, green, blue, & purple. Make sure to mix the food coloring evenly into each bowl of batter.
After each of the 6 bowls of batter is the desired color, I bake 2 colors at a time. Yes, it takes time, but I only have 2 round cake pans, and it helps the layers to be evenly baked. I use 9″ silicone round cake pans. Bake each set of 2 colors for 15 minutes (give or take, depending on your oven) at 350° F. Remove from the oven, let cool for a few minutes, turn onto cooling racks, and bake the next 2 colors. Repeat the process for the last 2 colors.
For the frosting, I made Mascarpone Whipped Cream (this amount frosted the entire cake…between the layers & the entire exterior):
- 16 oz. heavy cream
- 8 oz. mascarpone cheese
- 1/4 cup granulated sugar
- 2 tsp. vanilla extract
Place all 4 ingredients into a large bowl & mix on high speed with hand mixer, until it is the desired consistency. I find that, with the mascarpone cheese, the ingredients turn into thick whipped cream in no time at all.
Last step (well, before eating the cake, of course)…assemble the cake. Put a little whipped cream between each layer, and then frost the entire exterior of the cake.
What is your favorite dessert? Please share in the comments below!